A couple of weeks ago I decided to build a camera birdhouse for my backyard, and while I always do things overkill, its not actually that difficult if you decide to make a simple birdhouse with motion triggered camera, taking images when a bird drops by.
Honestly, I am surprised about the joy of all suddenly getting images of these birds dropping by and rushing to the windows to see them in action or just enjoying the images and get a feeling of nature while sitting and working.
Lets get started! While there are close to unlimited number of combinations between hardware configurations, you could use a ESP-32, Arduino with SPI cameras, Orange Pi, Banana Pi… and the possibilities goes on – I will only cover the use of RasperryPi Zero 2 w in this guide but pick your flavor!
Automate your camera trap image analysis with Animal Detect
Join today to analyze thousands of images in minutes using latest AI models.

EASY (MINIMUM) SETUP
Hardware list:
- ~700 g PETG filament
- Raspberry Pi Zero 2 W
- Raspberry Pi Camera Module 3 (wide-angle; pick your favorite)
- microSD card (16 GB +)
- Raspberry Pi Zero ribbon cable (the official one—third-party cables don’t fit!)
- Grove PIR motion sensor (Seeed Studio)
- Hot glue, silicone, or E6000 glue
Total cost: ~ €40–60
Additionally, you’ll need a 3D printer and a soldering iron.
Start your printer!
With 100% speed on my P1P Bambulab printer the whole print took around 30 hours.
The model can be found here: https://makerworld.com/en/models/453035-classic-bird-feeder-octagonal-house#profileId-360323 by https://makerworld.com/en/@Techro3D
For the RPI enclosure find the “FreeCadPart.py” in https://github.com/HugoMarkoff/outdoor_birdcam and install FreeCad software – yes it’s free (please ignore my other code - it’svery specific to my setup)!
To build it and export it to the printer:
-
Go to Macros
-
“Create”
-
Select name of your file (could be test.py)
-
Copy the FreeCadPart.py code content into your created macro and press play
-
Select your part (May be called DoorTab_DualMortise – thanks GPT)
-
Press File – export – save as STL Mesh – Done
Alternatively you can always export my code directly as a Macro instead of creating your new Macro.
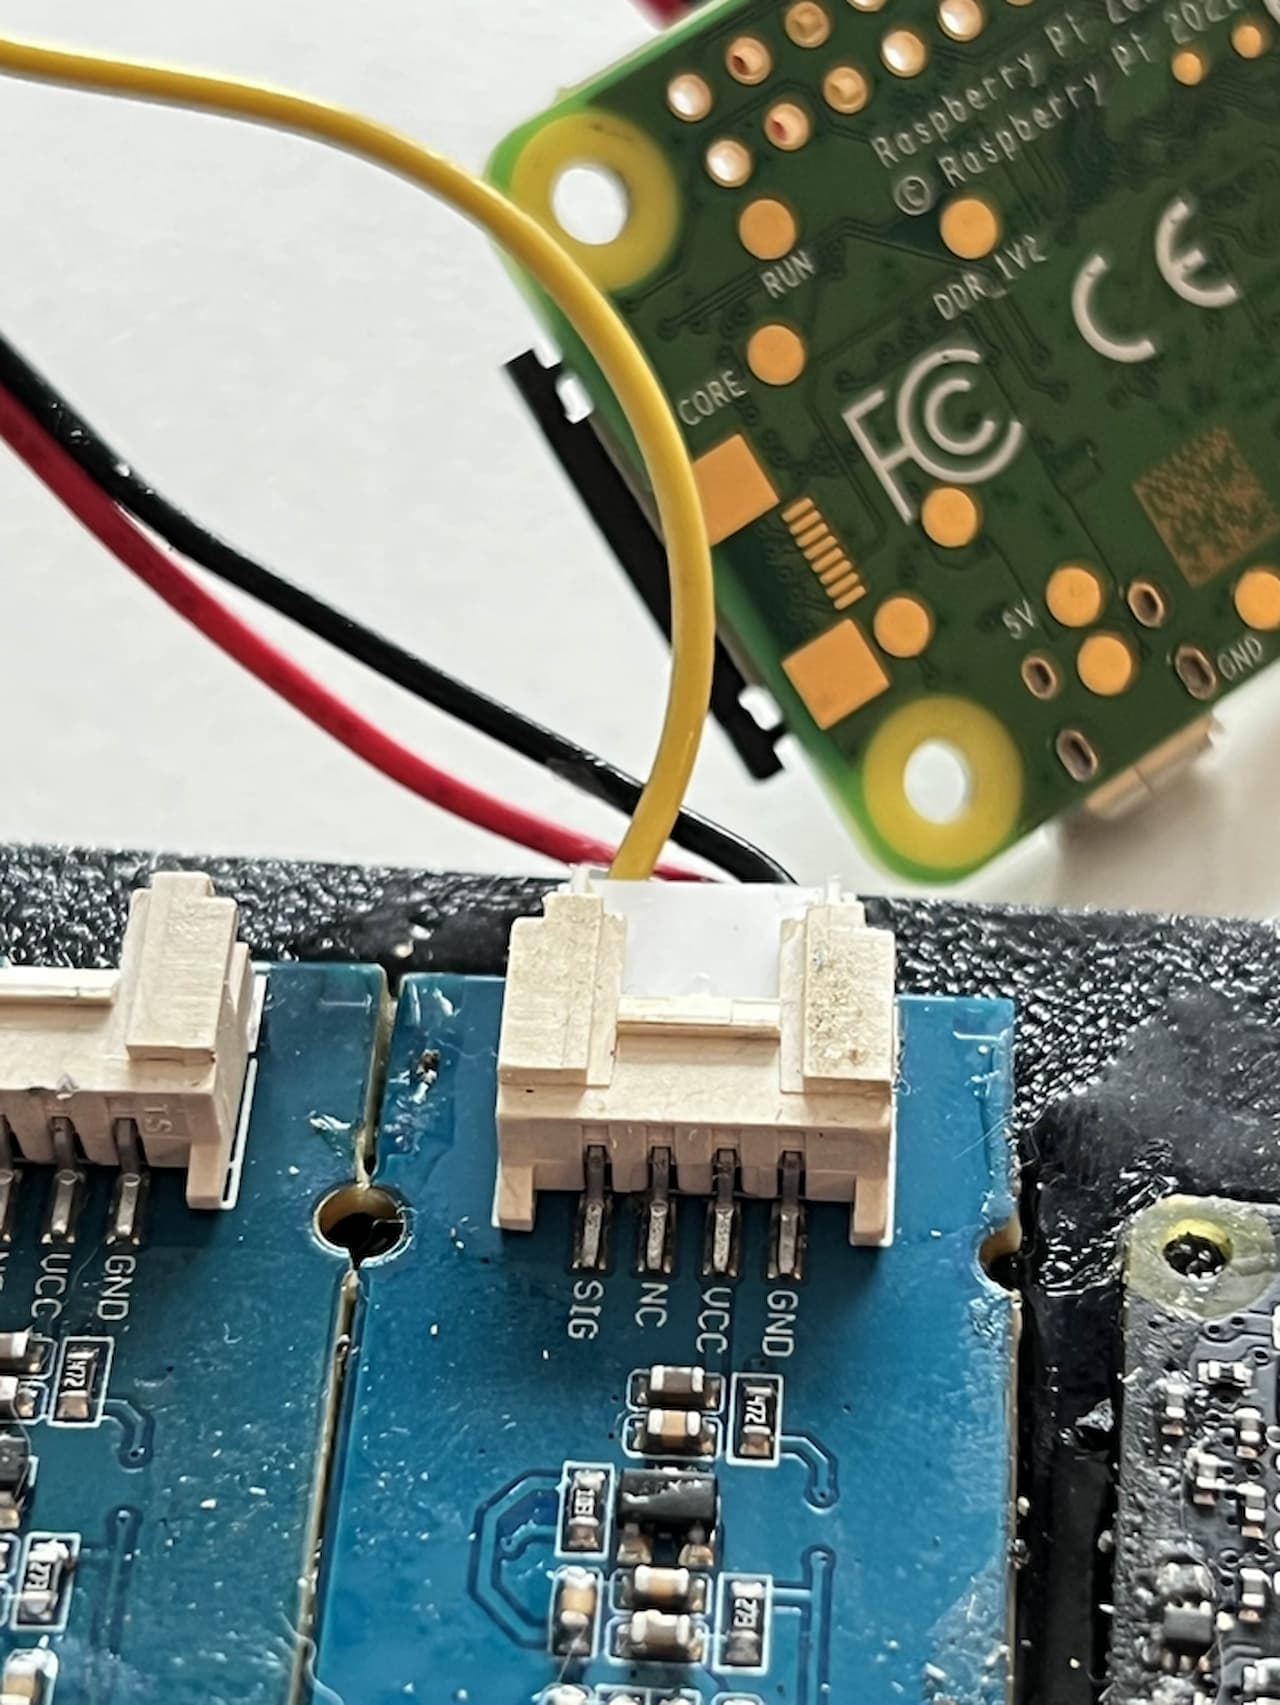
WIRING THE MOTION SENSOR
The Motion Sensor comes a cable with 4 wires. GRD, VCC, NC and SIG. You can right way cut off the NC (not connected) with cable, and the header of one of the sides.
On the RPI side, you can connect the VCC either to 5V or 3.3V with this Grove Motion Sensor, I recommend the 3.3V, ground to a ground, and VCC I selected the GIPO pin 17 on RPI.
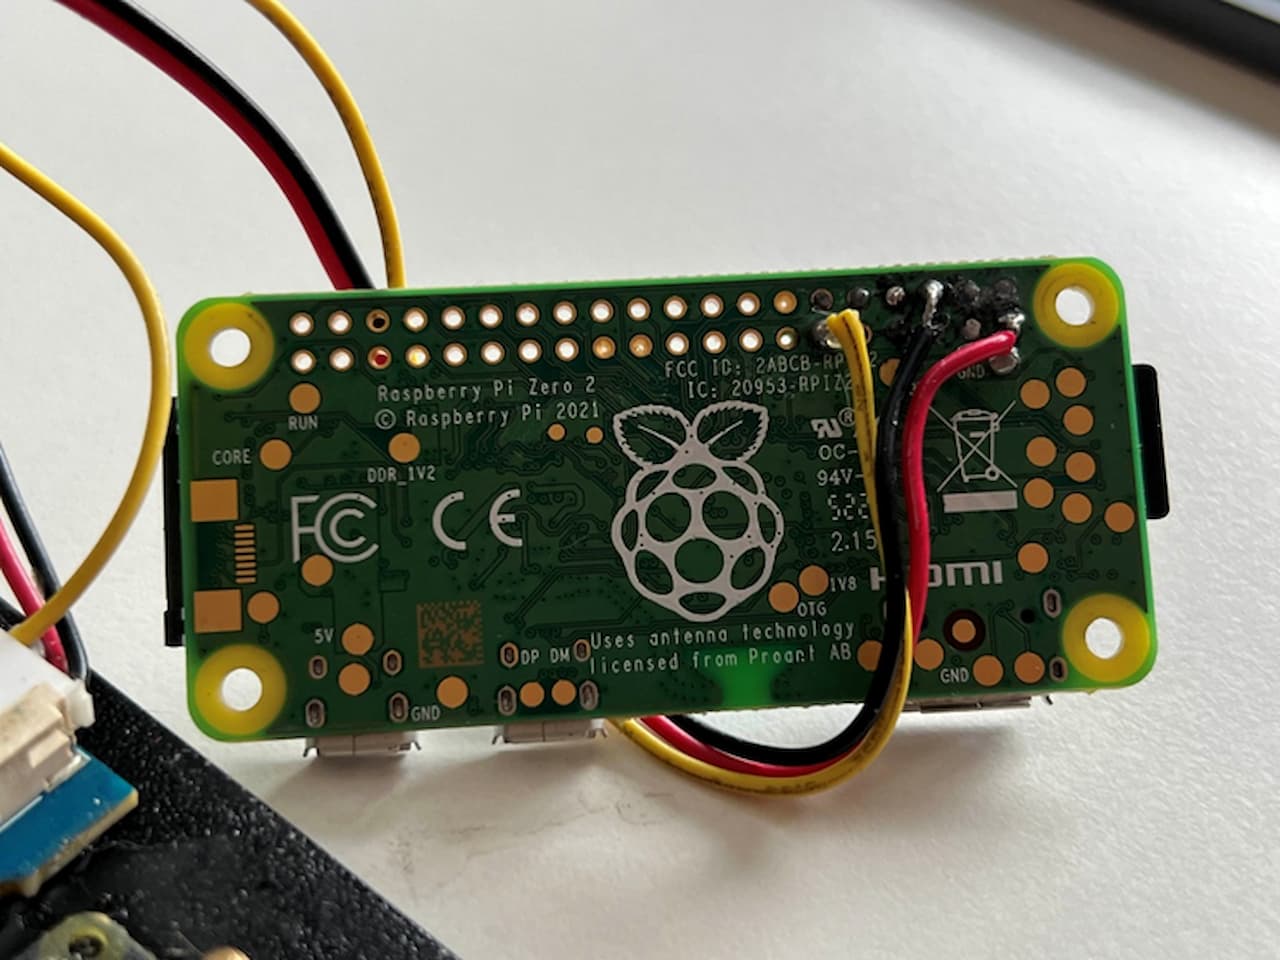
Alright – you got the motion sensor and RPI connected! Hopefully without accidents (I have very shaky hands so I had some) You can adjust both the “SENS” and “ONTIME” on the PIR sensor. For on time I put it to minimum so it can go from “HIGH” to “LOW” in just a couple of seconds, and then programmatically make sure to have delays between images. Sensitivity is just above halfway for me – you may want to play around with it 😊
FLASHING THE OS & FIRST BOOT
Alright now what? Grab your SD card, download Raspberry Pi Imager https://www.raspberrypi.com/software/ insert your SD card and follow the instructions. I choose Raspberry Pi OS Lite (32-bit) which is a OS without GUI and can be challenging for non experienced people to use – therefore I recommend the Raspberry Pi OS 64-bit version which is recommended when you have selected your board and are about to select OS. The minus, if you don’t have a HDMI to HDMI mini adapter or cable, you may have issues connecting to the GUI – so in this case you can still find your RPi IP address by scanning your network and SSH to it IF you EDIT SETTINGS before buring the OS image and enter your WIFI configuration, username, password and so on.
Follow the instructions to install the OS and you are ready to start coding! Your first code may look something like:
import time
import RPi.GPIO as GPIO
from picamera import PiCamera

GPIO.setmode(GPIO.BCM)
PIR_PIN = 17
GPIO.setup(PIR_PIN, GPIO.IN)

camera = PiCamera()
camera.resolution = (1920, 1080)

try:
    while True:
        if GPIO.input(PIR_PIN):
            ts = time.strftime("%Y%m%d-%H%M%S")
            camera.capture(f"/home/pi/bird_images/{ts}.jpg")
            print(f"Captured {ts}.jpg")
            time.sleep(2)  # debounce
        time.sleep(0.1)
finally:
    GPIO.cleanup()
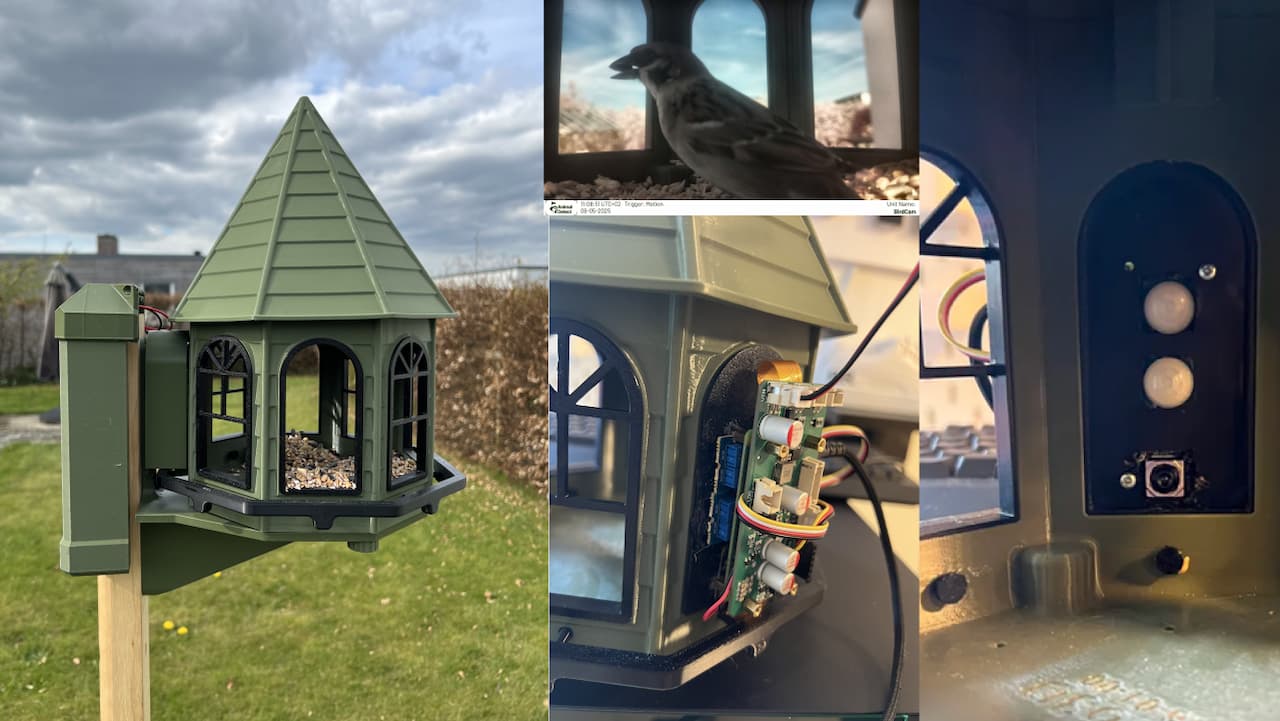
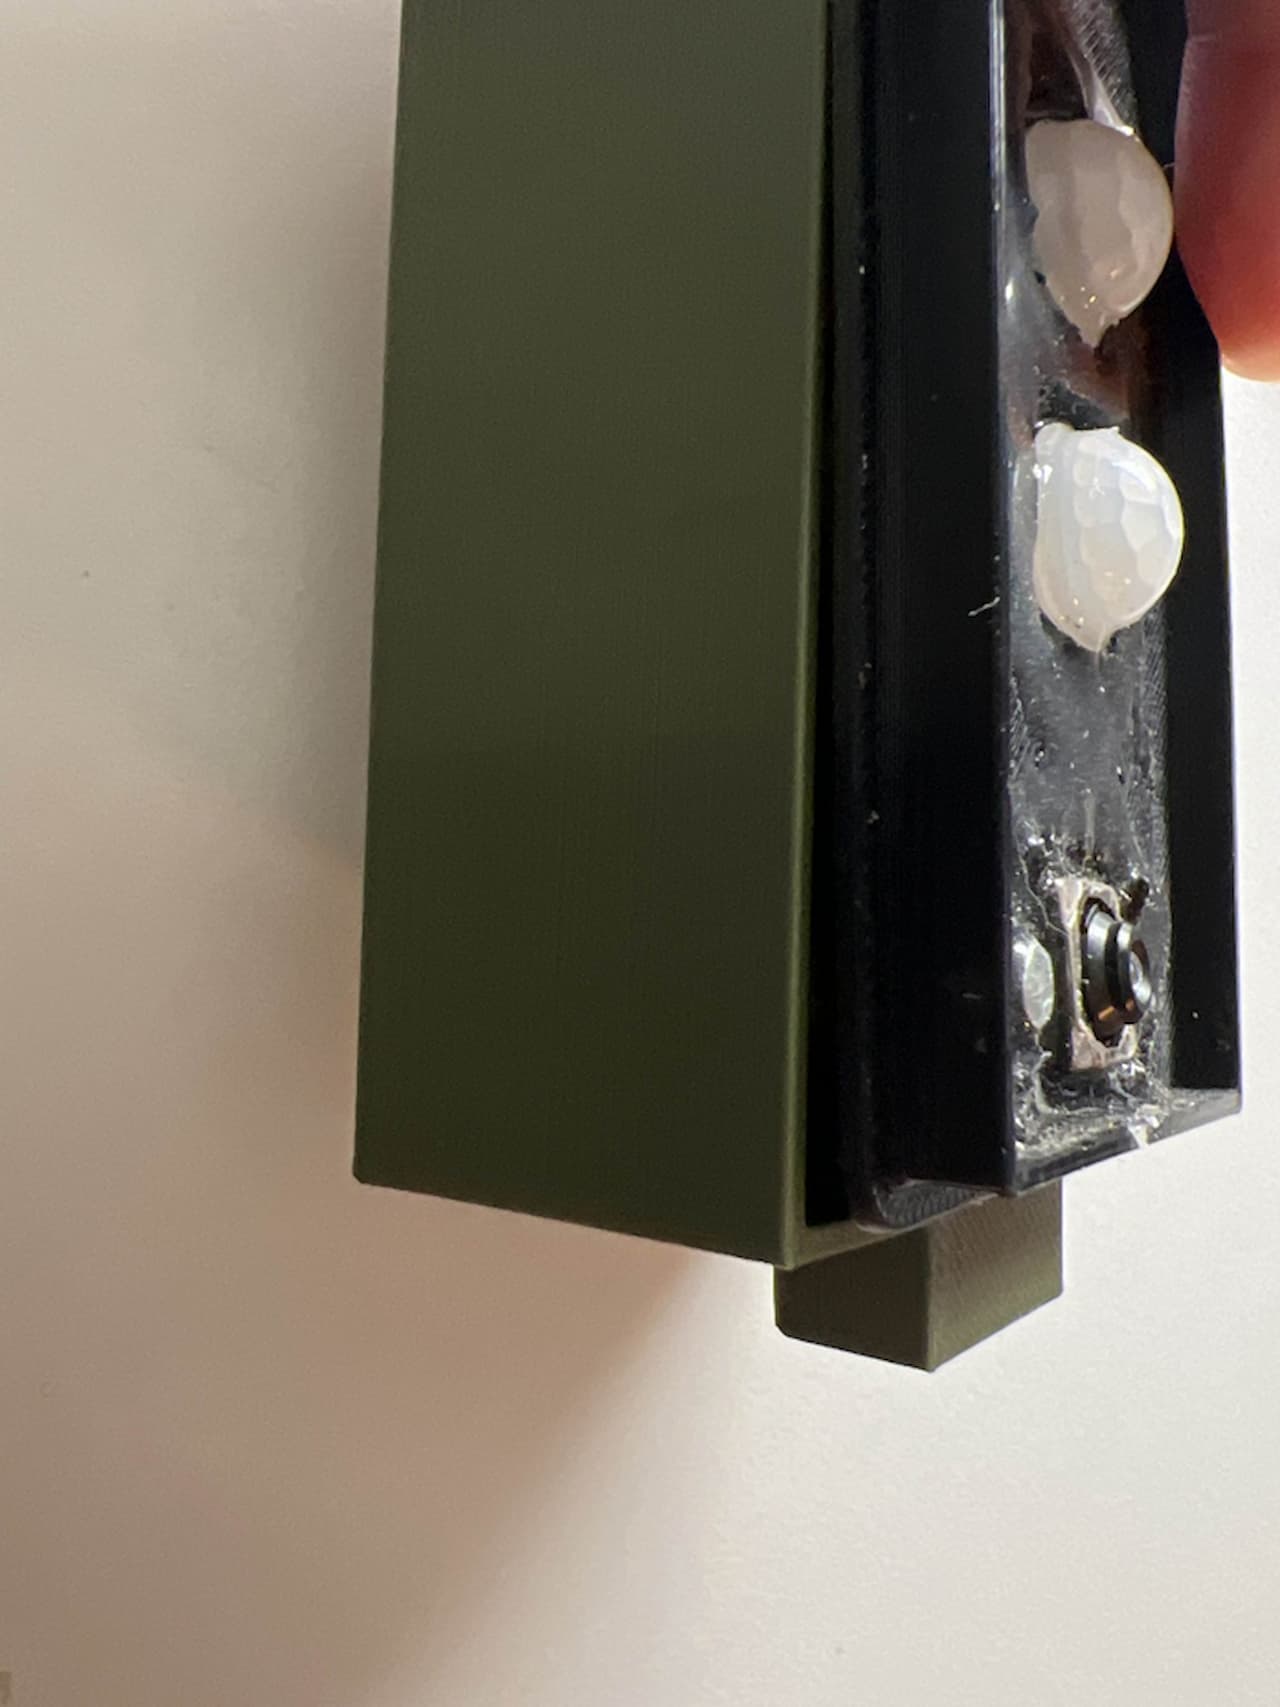
ASSEMBLY
I am extremely lazy, there are several ways to modify the existing 3D files to make perfect cutouts for the camera and sensor, I simply took a drill and the hot soldering iron to make the shapes – then used E6000 glue to put all pieces together and making sure there is no humidity coming through the hoses to the other side where I placed my electronics. How does it look?
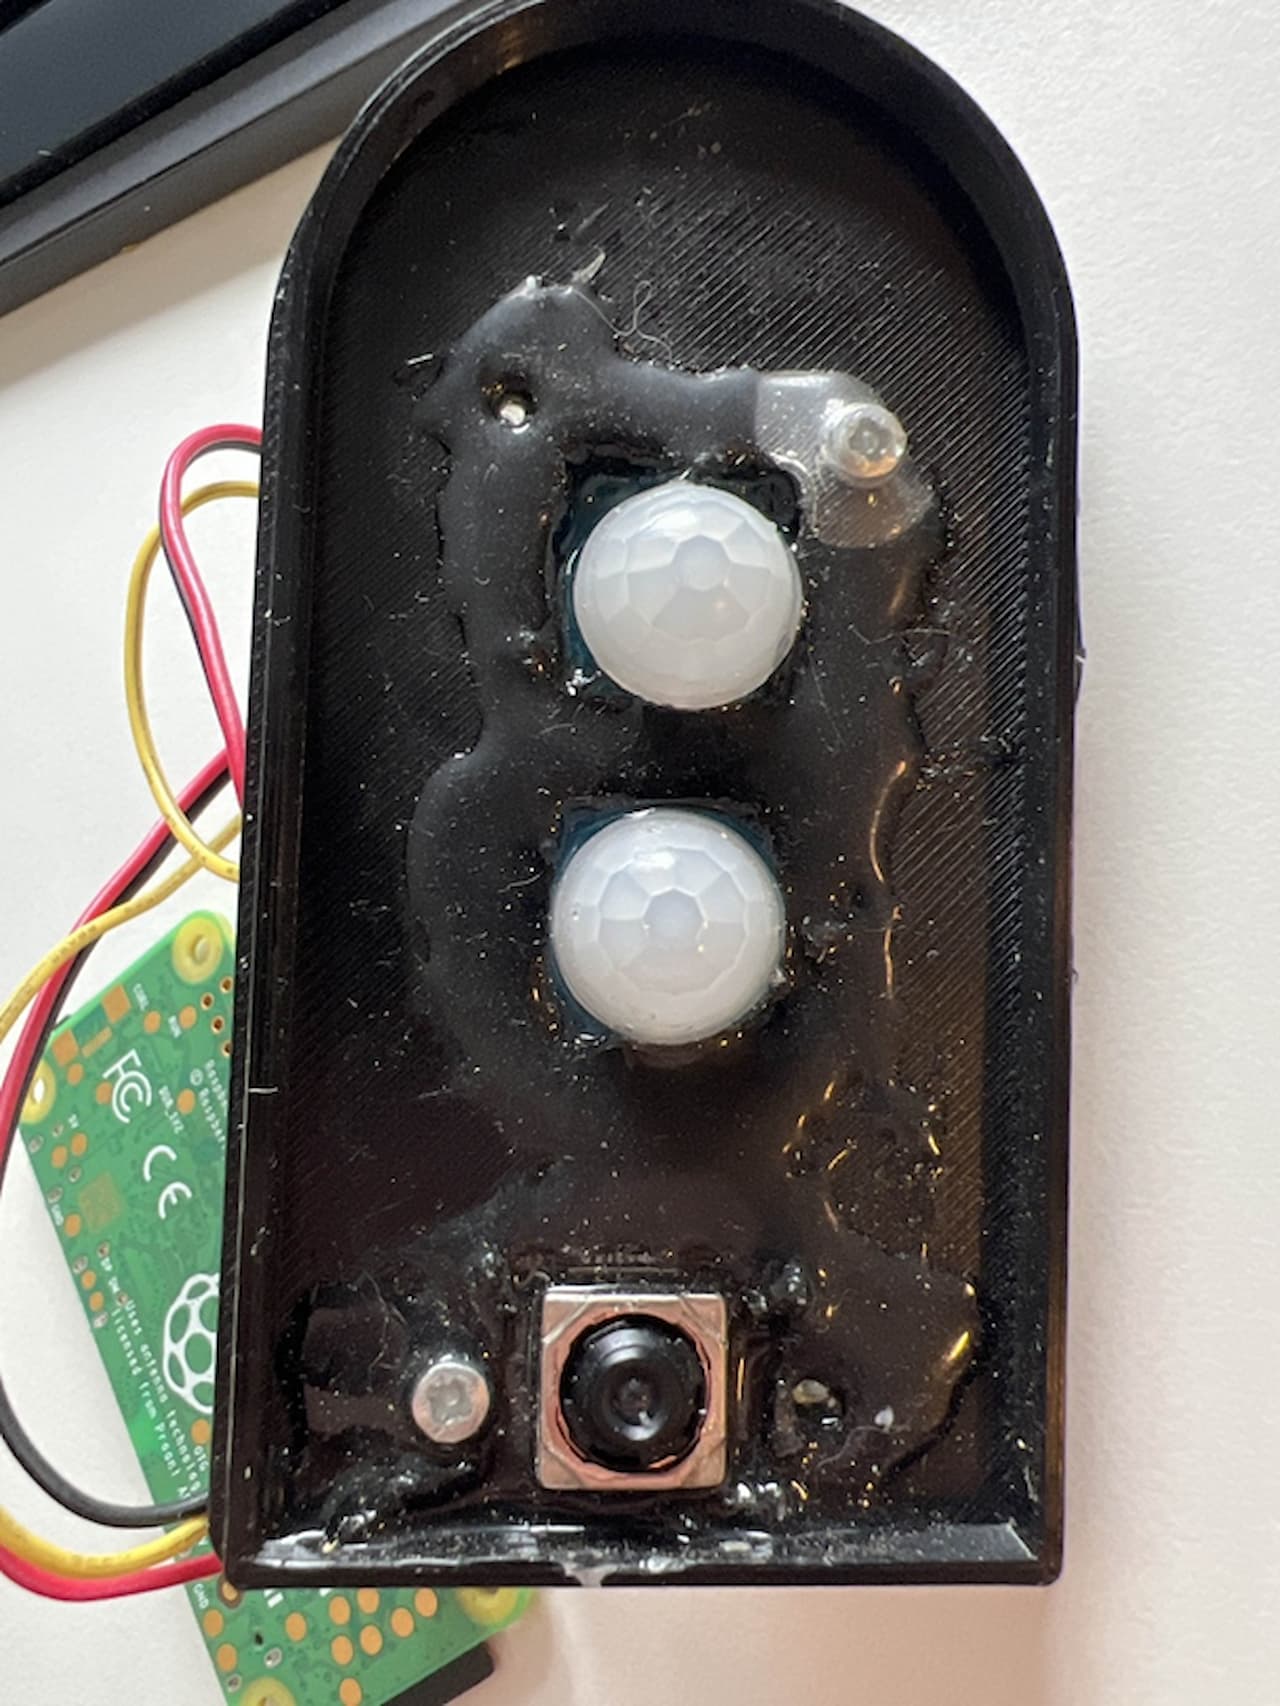
Well its not beautiful.. (I used 2 PIR sensors for my own setup - don't ask why .__.)
My recommendation – place the camera in the verry bottom and the PIR sensor in the middle of the SOLID “window” from the 3D printed parts.
Now – you have the possibility to drill a small hole in the “cap” you made from FreeCad to get a power cable in – which I recommend using if you don’t want to spend too much time on making your bird camera 😊You can also use a power bank – like the Anker 20000mAh which should give a few days of juice running the RPi Zero 2 w 24/7.
Glue everything together and make sure no moist can reach your electronics, if you have a silica bag to throw in there, even better – as sealed as possible!
Put everything together - the model is amazing and there are no additional screws needed; well you probably want to mount the birdhouse somewhere - so maybe some screws may be required after all.
Power on -> Code running -> Wait…
To autoboot your code when the PRI turns on, you can either make a service or activate and modify rc.local – I recommend you google how to set it up or ask GPT to keep this article a bit more general.
Easy mode ends here and some more advanced possibilities and ideas follows.
Forward images
There are several ways to forward images, you can set up an email service to send you images through email each time you get a new image, you can even make code to send you MMS with images. More mature setup would be setting up a database, and I recommend firebase (because I used it myself but I really have no strong preferences) Firebase gives you basically a free way to set up a real time database and storage (assuming your project does not exceed some crazy amount of requests/data) the cool part about firebase is that you can send images to your database, and create triggers each time you get a new image. This allows you to build both web apps, phone apps or other fun projects to show the images and/or send notifications! We already built a firebase structure for our wildlife cameras, so it was a no-brainer for me to connect it there, as we also have an app :D
Battery
Well for a true wireless configuration, battery is the way to go. The most simple is obviously a power bank, but there are several possibilities to connect a small LiPo battery to your RPi zero but you will need a board in-between to handle the power, like https://www.adafruit.com/product/3196 board which can make sure to give you the juice you need. The issue? Well an always powered on RPi drains some power, and a small battery will give you limited time. Going into the lite OS, deactivating HDMI ports, deactivating services you don’t need and so on will save you some power, but still, don’t expect more than a day or two from a small battery and an always on RPI.
Using an Arduino like board for wakeup
You can choose to use a low powered microcontroller like the 328P which is often used by Arduinos to wake up the RPI and make it take an image, send it, and close for power again. This makes sure you can use a high MP camera on the RPI and also have some of the strong processing, while only working “on demand”. The issue? Well there is a whole world of “how to boot” quick on your RPI, and I’ve seen some insane boot times of… well maybe not so insane.. 3 seconds on the RPI 3 models. And you can expect probably 9 seconds when you have stripped down everything, overclocked and what else before you start supplying power and getting an image from your RPi camera module. And its PAIN. If you have birds being cozy in the bird house for 10+ seconds and enjoy themselves then this is still a viable solution. However, most birds visiting my house makes quick drop in-out visits.
Connectivity
Well not to sound a bit stupid, there is an integrated WiFi antenna on the RPi 2 W model, but putting the birdhouse far away from my routers? I had to go around and test where I could get connections outdoors, and it was determining where I had to place the birdhouse, meaning I couldn’t place it where I wanted, instead closer to my house. You can actually get a coax connection soldered directly to your RPi board and get an antenna to solve your issues, but I don’t have the tools or patience to do it, see a nice video here: https://www.youtube.com/watch?v=6R8xhSzpJTU
Super duper overkill AI features:
Well, for starters, I have an AI server running in my garage where I have an enpoint setup to see if there is an animal detected - making sure I never get "empty" images sent as notfications. You can also add different bird-species AI models, and even recording cound/videos and use AI to analyze the birds inside of your garden :) So - with other words - fun fun fun.
Recommendations if you want to make a long lasting battery driven birdcamera
Well don’t use a RPI, go for an ESP-32 with WiFi and just deal with the less megapixel camera options.
Enjoy making your next birdhouse!
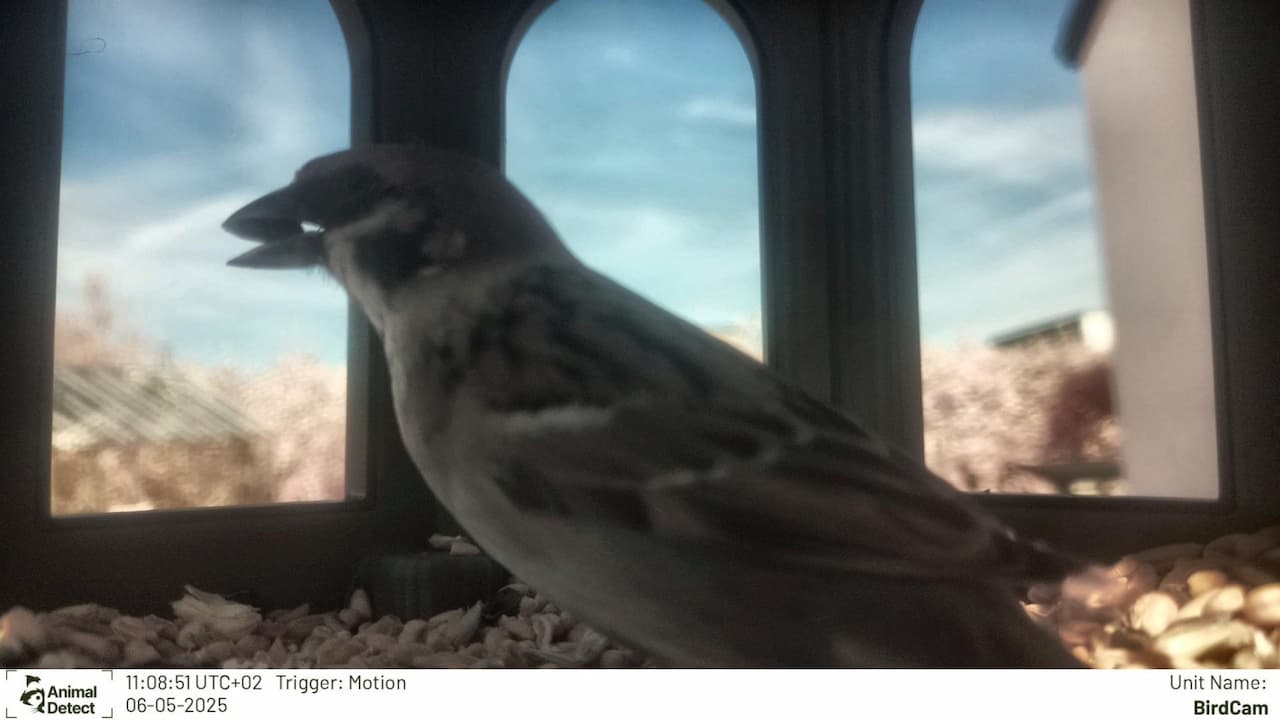
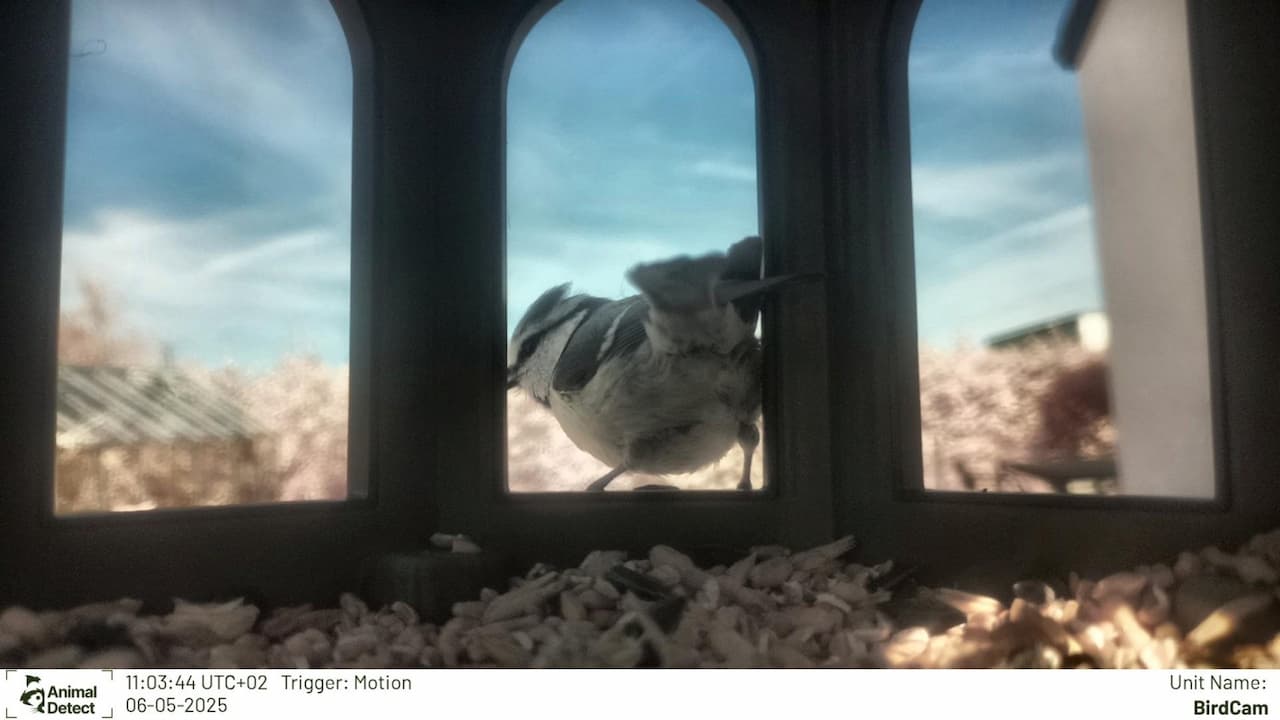
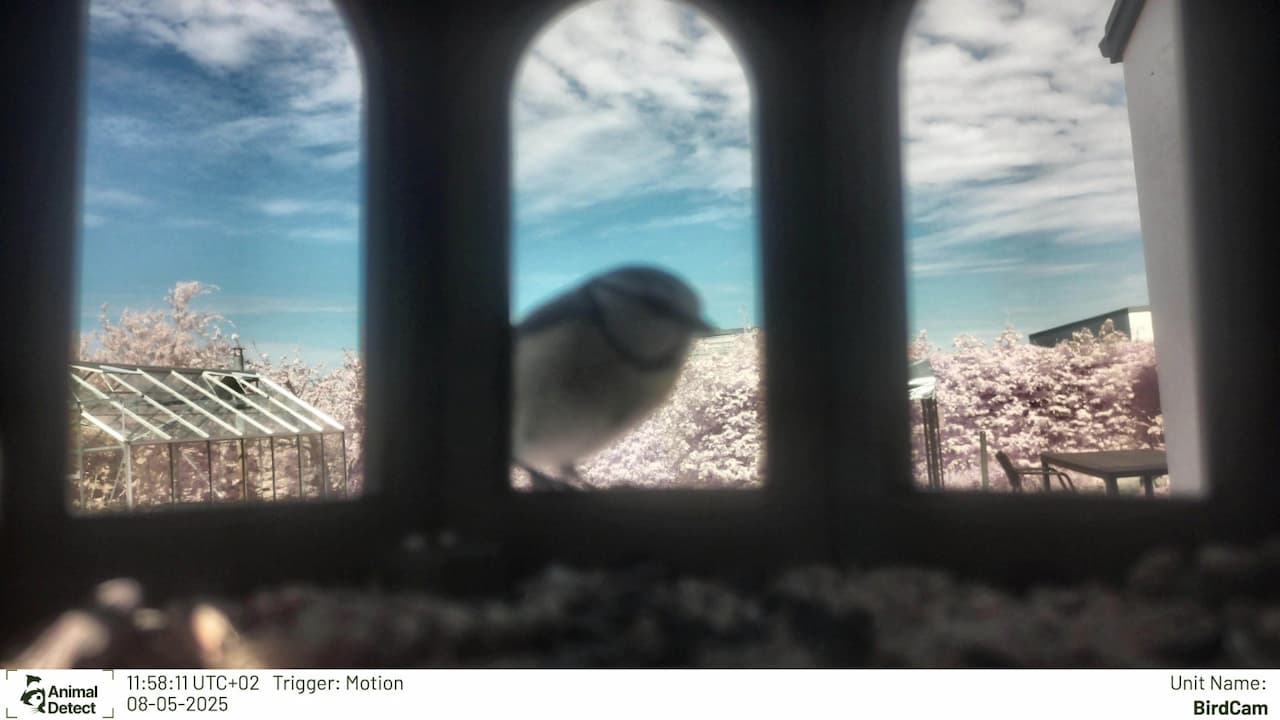
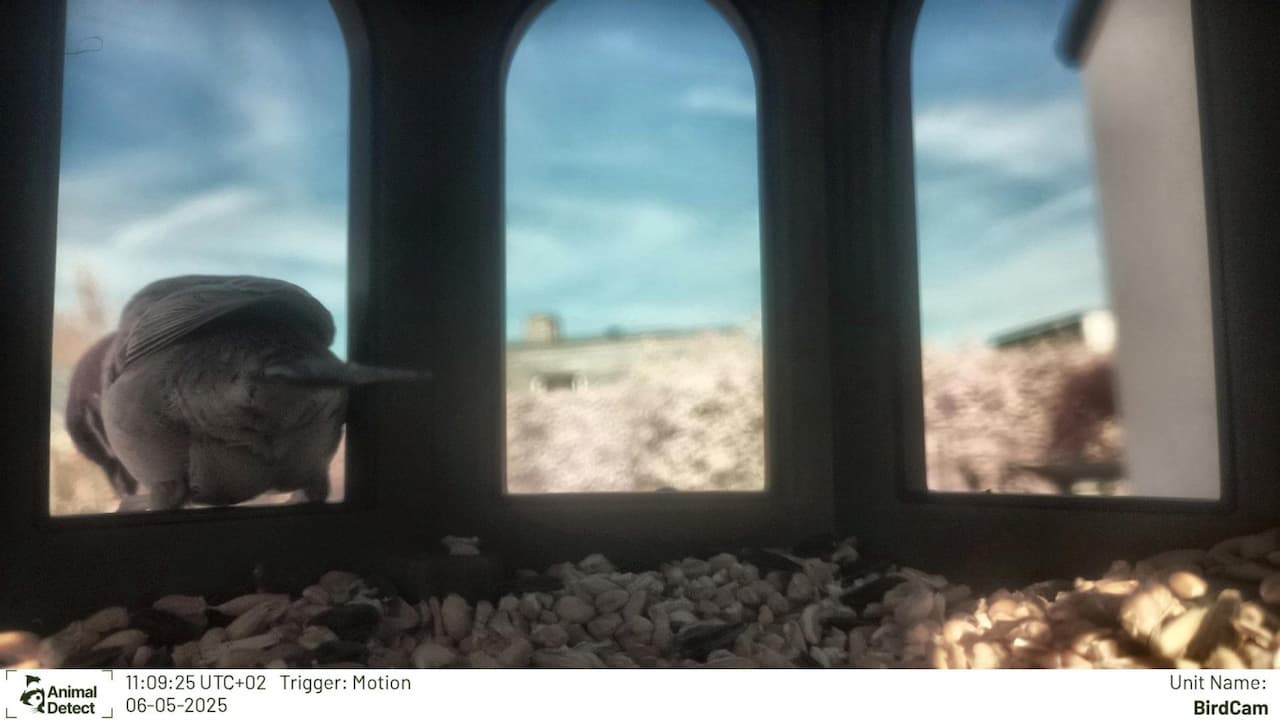
Finally some images :D